
Have you connected your Salesforce environment with your Automation 360 environment yet? If not - check out this 3 part tutorial series on setting up and using the Automation Anywhere Salesforce connector available on the Salesforce AppExchange.
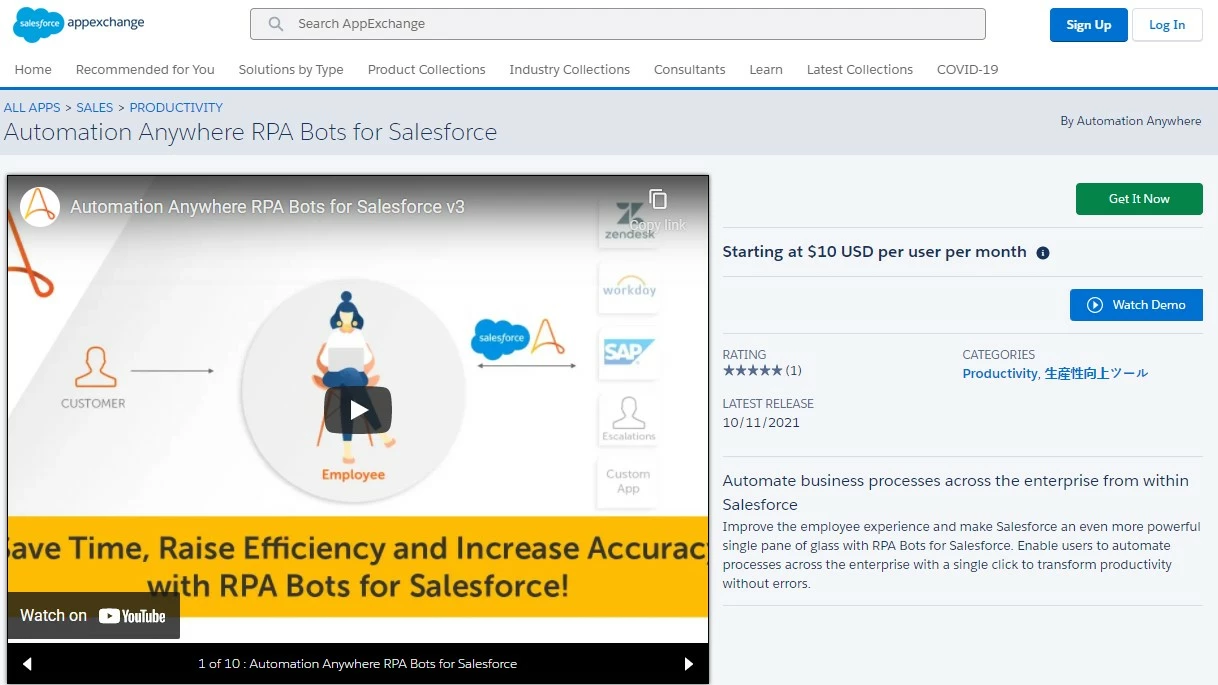
The Automation Anywhere RPA Bots for Salesforce app that's available on Salesforce's AppExchange enables organizations to tightly integrate their Salesforce environment with their Automation 360 environment. This integration enables Salesforce users to trigger bots directly from the Salesforce interface that can run on Automation 360 bot runners (this can be attended or unattended based on how each bot configuration is set up). Best of all, variables from the executing bot marked as output values can be mapped back to Salesforce to automatically update/create/delete Salesforce objects.
Who This is For
This tutorial is designed for anyone interested in seeing how Automation 360 and Salesforce can be integrated. That means that throughout the tutorial I'll be using a Salesforce developer environment, which you can freely sign up for. On the Automation 360 side, I'm not using Community Edition for this tutorial series because to test the integration from the Salesforce side to the Automation 360 side, you do need to have a bot runner set up.
Register for a Salesforce Dev Account
This step is really only required if you don't have a Salesforce environment already - or if you want to test this out on a dev environment as opposed to an enterprise account. Thankfully, Salesforce makes this process straightforward and the environment can be created relatively quickly. Fill out the registration form for a developer environment, and you should be able to get something up and running within 5-10 minutes of verifying your email with their system.
The Setup
There are several steps involved in preparing our Salesforce environment. It should be noted that these steps may require elevated privileges if you arent working in a Salesforce developer environment as is demonstrated in the video above - so check with a Salesforce admin in your environment should you run into issues with setting up any of these steps.
Create a Certificate
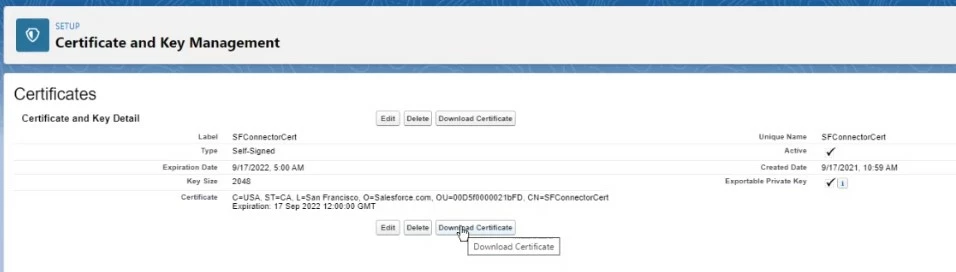
When a bot is triggered from the Salesforce environment to execute in Automation 360, a callback will occur after the bot execution which provides the ability to update values/objects in Salesforce, as well as updating the Salesforce UI that the bot execution is completed. For callbacks from the Automation 360 environment back to Salesforce to work properly, a certificate must be created. Again - if you already have a Salesforce env and you're handling your certificates in a slightly different way, work with your Salesforce admin on how to appropriately create/import a cert. For developers using the Salesforce Self-Signed Certificates (which includes users following the tutorial with the Salesforce developer environment) - head to Settings > Security > Certificate and Key Management. From there, you'll click the Create Self-Signed Certificate button to generate a new certificate. On the Certificate page that appears, give a label and unique name for your certificate and select Save. Your certificate can then be downloaded locally and stored by clicking the download button. (we'll be using it later on in the tutorial - so hang on to this...worst case you can always download it again later).
Create a new Connected App
A connected app in Salesforce gives Automation 360 something to actually connect to. As before, if you already have a connected app that you want to use, just review the configuration below to ensure your app has the required configurations. If you're following along with a Salesforce Developer account, mirror the steps below exactly. In either case, navigate to Platform Tools > Apps > App Manager from the Salesforce lightning setup page to find the Lightning Experience App Manager page. To begin creating a new connected app, click the New Connected App button in the top right-hand corner of the page. In the New Connected App page that appears, you'll need to provide a Connected App Name, an API Name (you can leave the first two matching to keep things simple), and a Contact Email address (consider using the same that you've used for your Salesforce Account access) in the Basic Information section. In the API (Enable OAuth Settings), we'll need to Enable OAuth settings and Enable for Device Flow (if you plan to ever invoke bots from a Salesforce flow). Additionally, we'll want to check the box to Use digital signatures and upload the certificate that we'd just created and downloaded. Finally, we'll also need to set up some OAuth Scopes to define exactly what kind of API access capabilities will be available through our newly created Salesforce Connected App. For our tutorial, we'll need Access and manage your data (API) as well as Perform requests on your behalf at any time (refresh_token, offline_access). The remaining settings can be left as default for our connected app. Press the Save button to initiate the creation of our Salesforce Connected app. You'll likely be greeted by a message indicating that changes may take up to 10 minutes to take effect, but you can go ahead and press the Continue button to continue on to the Managed Connected Apps page.
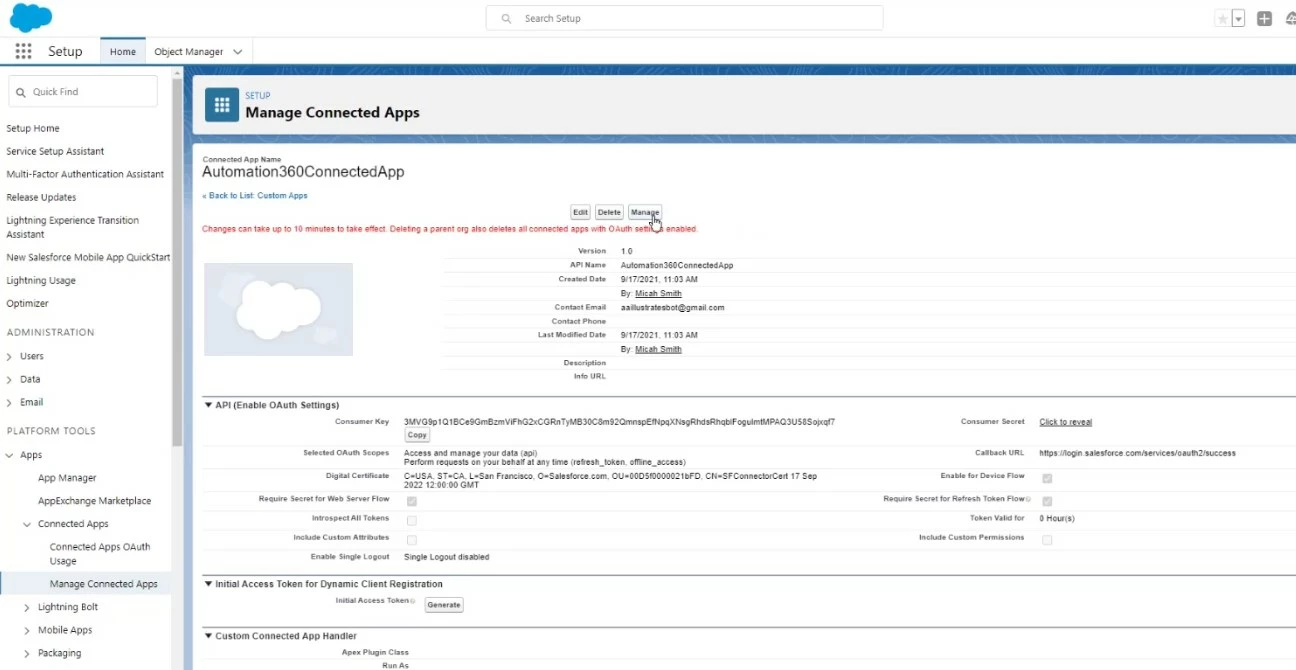
The Manage Connected Apps screen shows all the details for our newly created connected app - however, we do need to make a couple of modifications just to ensure this app will be ready to work not only with our Bot Creator device but also with our Bot Runners. Click the Manage button which will take you to the Connected App Details page where you can click the Edit Policies button to modify the Connected App's settings. There are 2 things we need to set on this Connected App Edit page:
- Permitted Users dropdown should be set to Admin-approved users are pre-authorized. This enables an admin user to establish who can connect to this app via OAuth.
- IP Relaxation dropdown should be set to Relax IP restrictions
To apply these configurations, press the Save button at the bottom of the Connected App Edit page.
Create a Permission Set
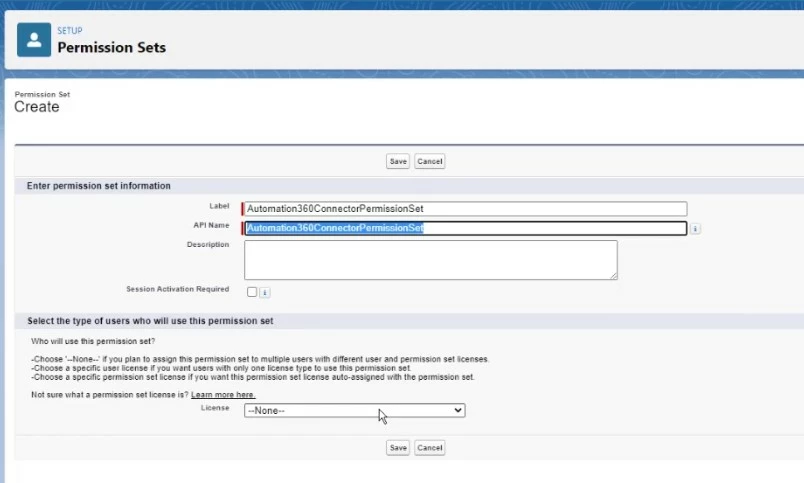
The last thing we need to do before actually installing the Automation Anywhere connector from AppExchange is to create and configure a Permission Set. From the same Salesforce lightning setup page, navigate to Administration > Users > Permission Sets. We'll be creating a new permission set, so click the New button to kick off that process. On the permission set create page that follows, provide the new permission set with a Label and API name (these two values can match). Press Save to create this permission set.
Once the permission set has been created, you'll be taken to a page that shows the different apps and permission set settings. Click the Assigned Connected Apps link to modify the apps that are configured with this permission set. In the Assigned Connected Apps page that appears, click the Edit button in order to add the connected app that we just created in the previous section. With the Connected App added to the permission set, press the Save button to confirm the changes. Our final configuration for the Permission Set is to Manage Assignments. From the Permission Set Setup screen (the screen you're taken to right after connecting your Connected App with your Permission Set), click the Manage Assignments button. From the Manage Assignments screen that appears, click the Add Assignment button. This is where we're establishing the connection between a user and the connected App we'd just created. For each user/group you wish to consume your connected app - check the box next to said user and press the Assign button.
Install the Automation Anywhere App on Salesforce
The final thing we'll do for part I of our series is to install the Automation Anywhere RPA Bots for Salesforce app from Salesforce's AppExchange. There honestly isn't a lot to this part - you click Get it Now and the installer will take care of installing the app into your Salesforce environment in the background. The cool thing about this app (from a developer perspective) is that it's a freemium licensing model - 3 bot connections can be made for free, and you can buy licensing when you want to use the app for additional use-cases beyond those original 3. This also means that no credit card/billing details are required to use it with those 3 users...so have no fear about installing this into your Salesforce developer environment to test around it.
Conclusion
The Automation Anywhere Salesforce App enables organizations to quickly scale the consumption of RPA bots within the organization through seamless integration with Salesforce. This tutorial focused almost exclusively on the pre-work required before we can configure and actually use the connected app. In our next tutorial in this series, we'll configure the Automation Anywhere Salesforce app to connect to our Automation 360 control room and smoke-test the connection by creating a basic bot to receive values.