

This tutorial is a guest post from Santosh Kumar Sabat from Giant Eagle - a grocery store and pharmacy chain in the United States.
Bots that can automate business processes clearly add immense value to organizations looking for a productivity boost. For many organizations, however, the robotic process automation happens invisibly to operational staff who may benefit from additional details around the status of bot executions, in addition to processing details like number of tasks completed or confirmation numbers. In order to provide this additional visibility to support staff, operational staff, and CoE leads - bots can be integrated with Microsoft Teams notifications to update different Teams channels when certain processing events occur. In this tutorial, we'll take a look at how Microsoft Teams channel notifications can be sent directly from within a bot.
-
Launch Microsoft Teams if it isn't already opened
-
Select a channel that you're a member of
-
Channels are dedicated sections within a team to keep conversations organized by specific topics, projects, disciplines. For example, you might have a team called "RPA" that has specific channels for "General Questions", "Production Support", "Release Management", etc.
-
-
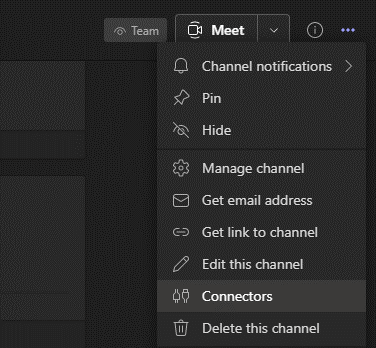
With a channel selected, click the icon with the 3 dots in the upper right-hand corner and select Connectors.
-
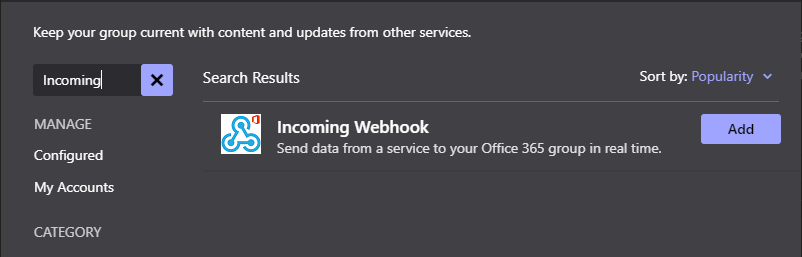
In the Connectors window that appears, you will see common application connectors as configured by your Teams admins. In the search field on the left side of the modal, type Incoming and press Enter to execute the search. As a result, you should find the Incoming Webhook connector as a result
-
If you don't see it, either:
-
You haven't selected a channel before doing your search - try selecting a different channel/teams object to see if the Incoming Webhook shows.
-
You don't have access to add connectors to this channel - check with the channel owner or Office 365 admin for resolution.
-
The Incoming Webhook connector has not been enabled by your Office 365 admin - check with them for resolution.
-
-
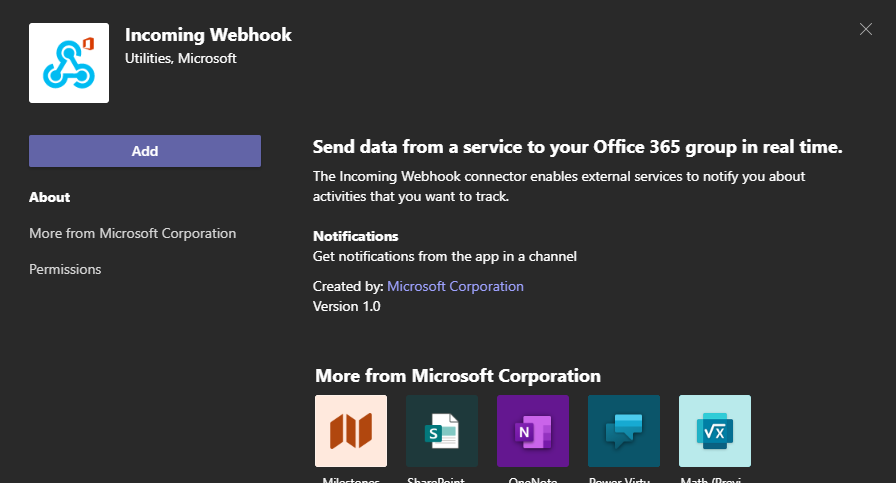
Press the Add button to add the Incoming Webhook to your channel
-
Note: Adding this connector impacts ONLY this channel. You'd need to repeat the steps in this tutorial to add this connector for multiple channels.
-
-
Another window may appear highlighting some of the functionality of this connector as well as other Microsoft Connectors, press the Add button to add this connector to your channel.
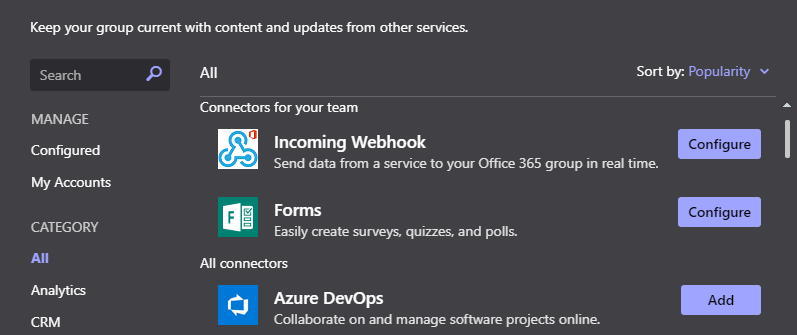
After clicking the Add button, the window may close or it may take you into an Incoming Webhook configuration screen (I've seen it work both ways).
If it doesn't take you to an Incoming Webhook Configuration screen, click back on the menu button with the three dots in the top right, select Connectors, and click on the Configure button for the Incoming Webhook connector.
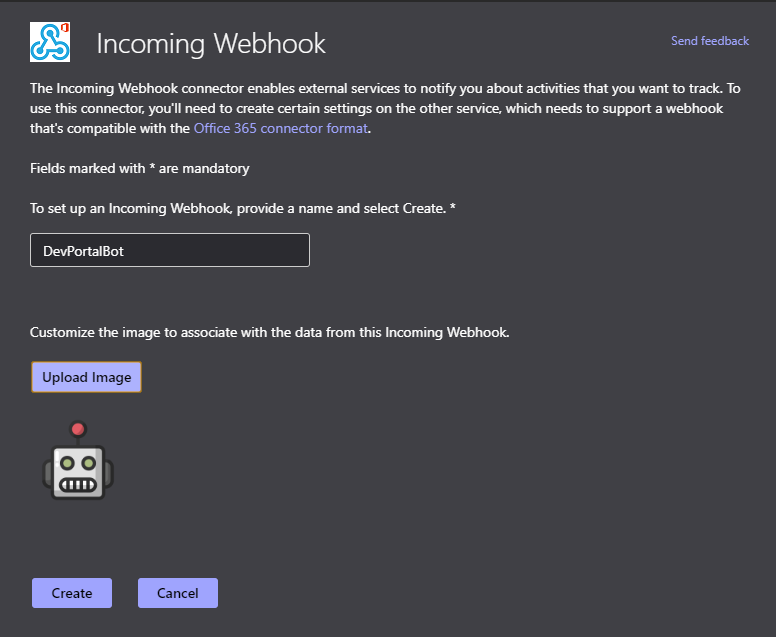
At this point, you're asked to provide a name and optional image for your connector. Provide a name for the Incoming Webhook connector as well as an image if you want to. (A random robot image was used here, but you can use whatever you want...and note that this image can be updated later should you choose.) Press the Create button to complete the creation of the Incoming Webhook connector.
Once created, you'll be provided with a URL for the incoming webhook. Copy this URL as we'll need it for the configuration of the bot. Once you've copied the endpoint URL provided, press the Done button.
Back in Automation 360, create a new bot (or modify an existing bot).
Add the POST method action from the REST Web Services collection into your bot.
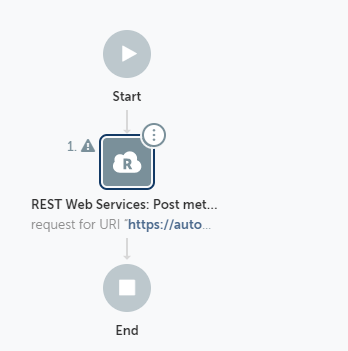
Paste the URI you just copied from the new Incoming Webhook connector that we just set up into the Enter the URI field.
-
{
    "Text": "Dev Portal Tutorial Test"
}
Leave the content type of the POST method as JSON (application/json), and enter the following JSON into the Enter the parameters field.
Note: In this example, we've hard-coded the message to be sent. Alternatively, you could consider using variables, or a combination of variables + static text here.
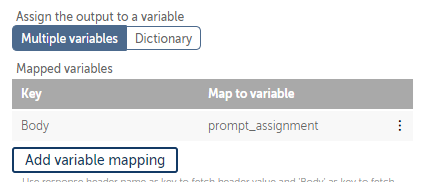
For the Assign the output to a variable section, click the Add variable mapping and map the Key Body to a variable...in this example we're using prompt_assignment.
Press Save and press Run to execute the bot.
When the bot runs, you should get a notification in the Teams channel you added the Incoming Webhook to with the message provided in the JSON body.

Conclusion
Automation 360 provides the ability to execute bots on headless bot runners to automate the manual tasks that many organizations are faced with. Through the use of Incoming Webhook connections in Microsoft teams, now those bots that were once running mostly invisibly to users can send out notifications to different Teams channels. Get creative with when and where you invoke such notification functionality:
- After a successful bot run?
- Only if the number of tasks the bot completed greater than x units of work (however you choose to define that)?
- In the case of error?
- At the completion of a daily system health and monitoring check?
